intro scene
You all must have watched detective shows, especially if you have lived in India. No one living India escaped the fever of the famous crime show – CID. If you have watched the show or any detective show you must be aware about Forensics. Without this department detectives in the shows and in real life will take their entire lifetime to solve cases. In short they would be potatoes.

So why am I talking about all this? What will you do knowing about forensics? if you are in your final year of high school, you must be pressured to choose a field. So I want to introduce you to the world of forensics or a special sector in it – DNA analysis.
wHAT IS DNA analysis
DNA analysis is well as the name suggests techniques used to analyse DNA. There are two forms of DNA analysis
- DNA profiling – this technique is used to identify a person. It is a key area in forensic science but can also be used in other areas.
- DNA barcoding – this is a technique used to identify a species.
Another area of DNA analysis is analysis of DNA sequences that helps as know which genes are useful using a database. However, it is a different are of genetics called bioinformatics and is for a later post. Right now we will focus on DNA profiling
DNA profiling relies on something called short tandem repeats in our DNA. These short tandem repeats are unique to each individual and are used for DNA profiling.
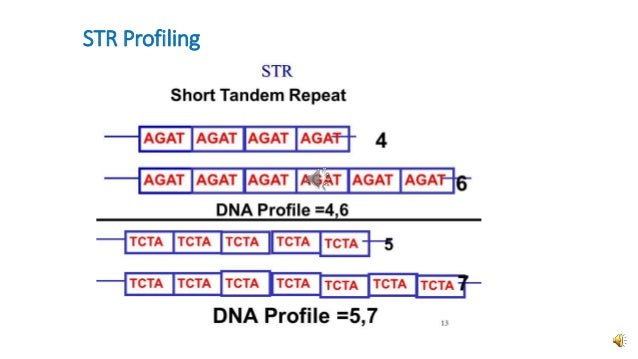
DNA profiling is too complicated to explain, so let us start with the basics. In this article we will look into how gel electrophoresis can be used to match DNA
gel electrophoresis
Before we delve into how it is done we need to understand what it exactly does and how it works. It is used to separate DNA fragment according to their sizes. It is used to match DNA samples.
It works on 2 principles:
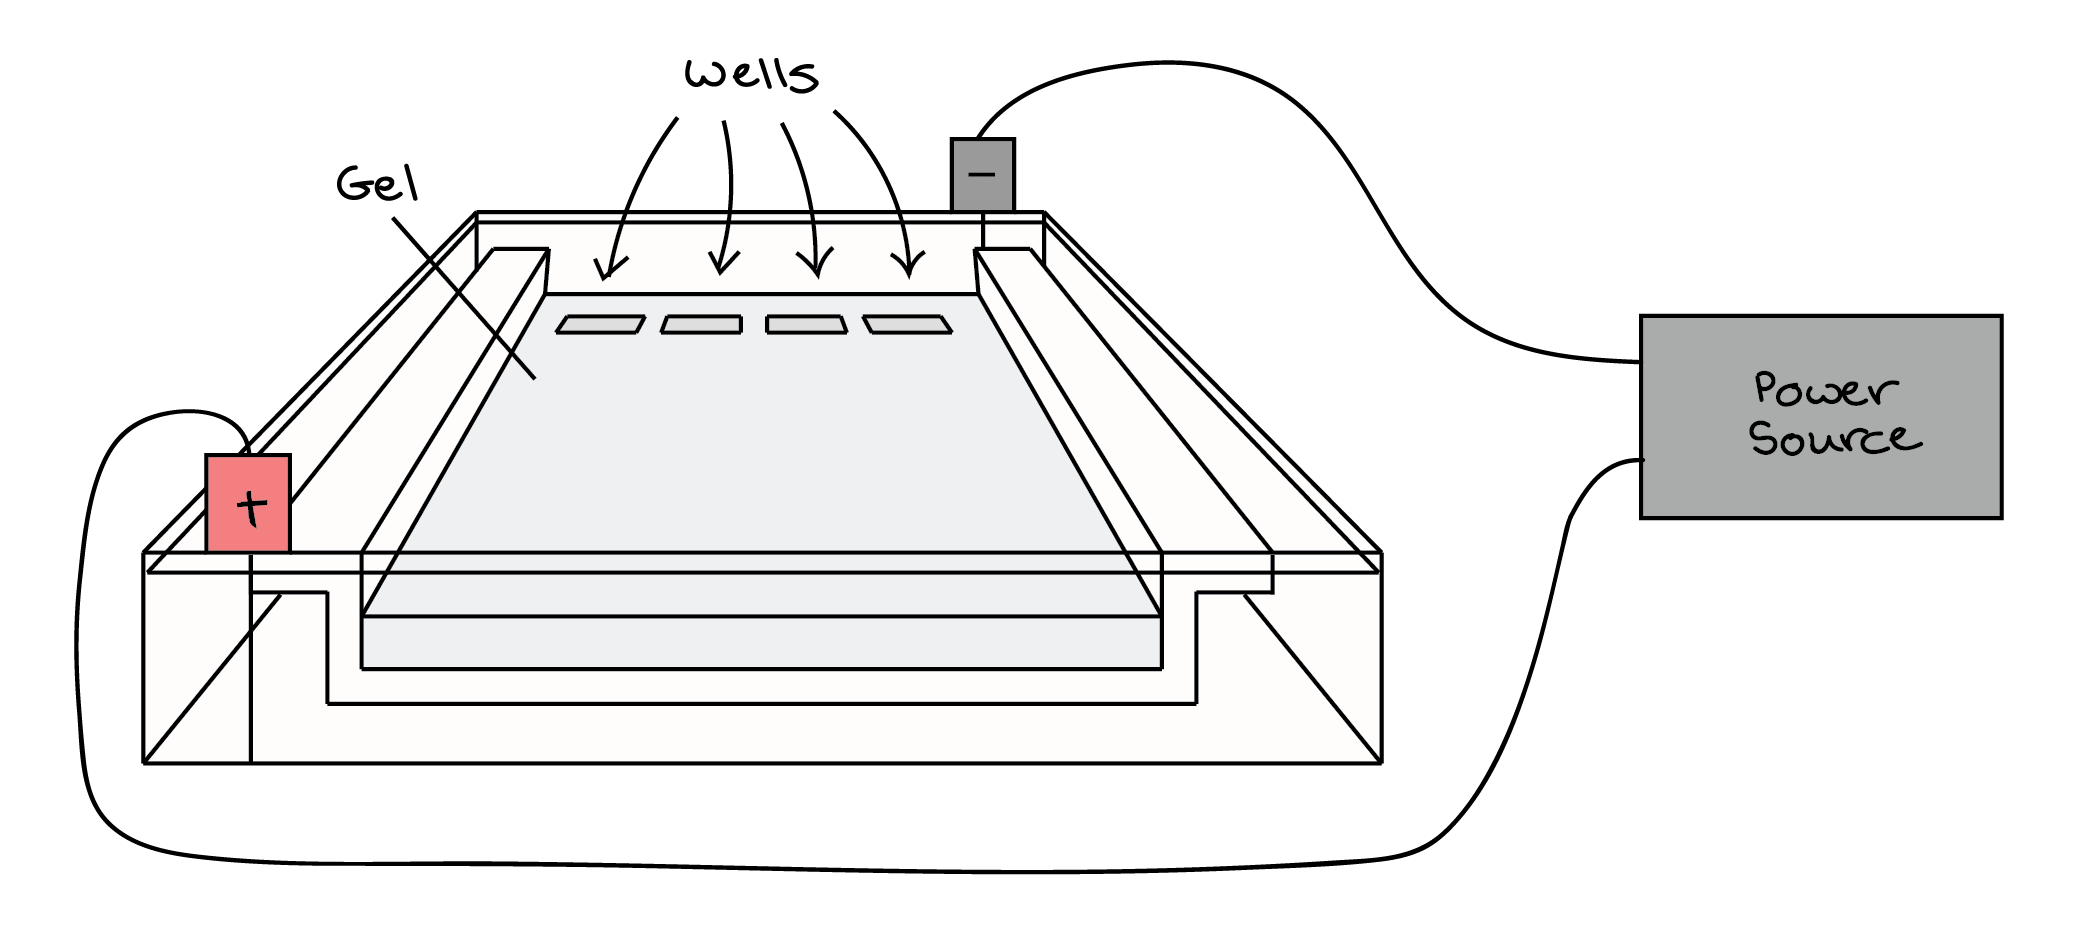
- DNA is negatively charged and hence it will moves towards the positive terminal of the power source.
- There are ‘pores’ in the gel. So the smaller fragments can squeeze through more so they travel a larger distance. Hence the smaller fragments will be closer to the positive terminal and larger ones will be closer to the negative terminal.
The size of a fragment is determined by a DNA ladder. The fragments in the electrophoresis is compared with the ones in the DNA ladder and the fragment size is determined.

experimentation
This is the main part, the interesting part. Without any delay and long intro let us get into it.
STEP 1: PREPARING THE AGAROSE GEL
It is sort of like preparing the agar agar that we eat, so that must be easy if you are a foody like me. If not, no worries my young pad-wan, I have written the entire process down for you.
cALCULATIONS
This is just an example, your calculations should be similar/done in the same way, according to your requirements. My calculations are according to my requirements i.e I need to make 4 sets of 30 mL gels. So please keep this in mind while reading through the materials and procedures.
- as we are preparing 4 sets of 30 mL gels we would need 120mL (4*30) of TBE Buffer
- measure 1.2 g of agarose (1% of 120)
MATERIALS
- Agarose packet (like agar agar)
- TBE buffer (how to prepare)
- Microwave
- Digital balance
- measuring cylinder (according to your required measurements)
- glass jar
- container for weighing
- spatula
- a dye – ethidium bromide
procedure
- Measure 1.2 g of agarose using a digital balance (use a spatula for putting it in the container that is used for weighing)
- Using a measuring cylinder, pour 120 mL of TBE buffer.
- Add the dye (few drops) to the mixture .
- pour the buffer and the agarose in the glass jar
- put the glass jar in the microwave for 1 minute. CAUTION: don’t close the jar with the cap tightly, just leave the cap on the mouth of the jar loosely (just to cover the opening and prevent it from spillage.)
- take the jar out and swirl it to check if the agarose is dissolved (completely transparent). If not put it in the microwave for 30 seconds. Keep on repeating till the agarose is completely dissolved.
STEP 2: SETTING THE GEL
This is a simple process.
- Pour the gel into a mold.
- put a ‘comb’ in one end of the mold. This will create the ‘wells’ in the gel where we will load our DNA sample

STEP 3: PREPARING THE DNA SAMPLES
This is just one step, but I am extra so I created a subheading for it.
- A dye is added to the DNA sample to increase its viscosity, thus preventing it from running out of the wells.
- DNA samples can be obtained from blood, saliva, urine and semen.
STEP 4: GEL ELECTROPHORESIS
This is the main part, the most important part. Since it is the fancy part it must be done carefully
materials
- TBE buffer
- solid gel
- electrophoresis tank
- power supply
- DNA sample
- micropipettes (10, 20 and 1000 μm )
- micropipette tips
- UV light
procedure
- Fill the electrophoresis tank with TBE buffer
- connect the tank to a power supply (don’t switch it on yet)
- look at your mold and see if the gel has become solid (will be translucent)
- if yes remove the comb and place the gel in the tank (submerge it in the TBE buffer). Make sure the wells are near the negative terminal
- using a micropipette load 10 μm of DNA samples in the wells (1 sample per well). The sample in the first well will help form the DNA ladder (load the DNA marker in the first well).
- close the tank and switch on the power supply.
- using the UV light look at the gel and the DNA fragments (the ethidium bromide dye causes DNA fragments to fluorescent)
- once the DNA fragments have migrated enough (near the +ve terminal), switch off the power supply
- Take the gel out
- Repeat this process with 20 and 1000 μm

STEP 5: VISUALIZING THE RESULT
This one requires your eyes. So keep calm and keep observing.
- take the gel out and put it under UV light
- Match the bands in each sample against the bands in the DNA ladder to find the size of the fragments in each sample
- match bands between samples to find out how similar the samples are (used in tests for biological relations)
- NOTE: Matching of bands is done in a horizontal line

ADDITIONAL HELP: HOW TO MICROPIPETTE
If you are anything like me, you probably won’t know what a micropipette is much less how to use it. If yes, then no worries. If I can learn, so can you and that is why I am here -to help you learn (mind you it is complicated).

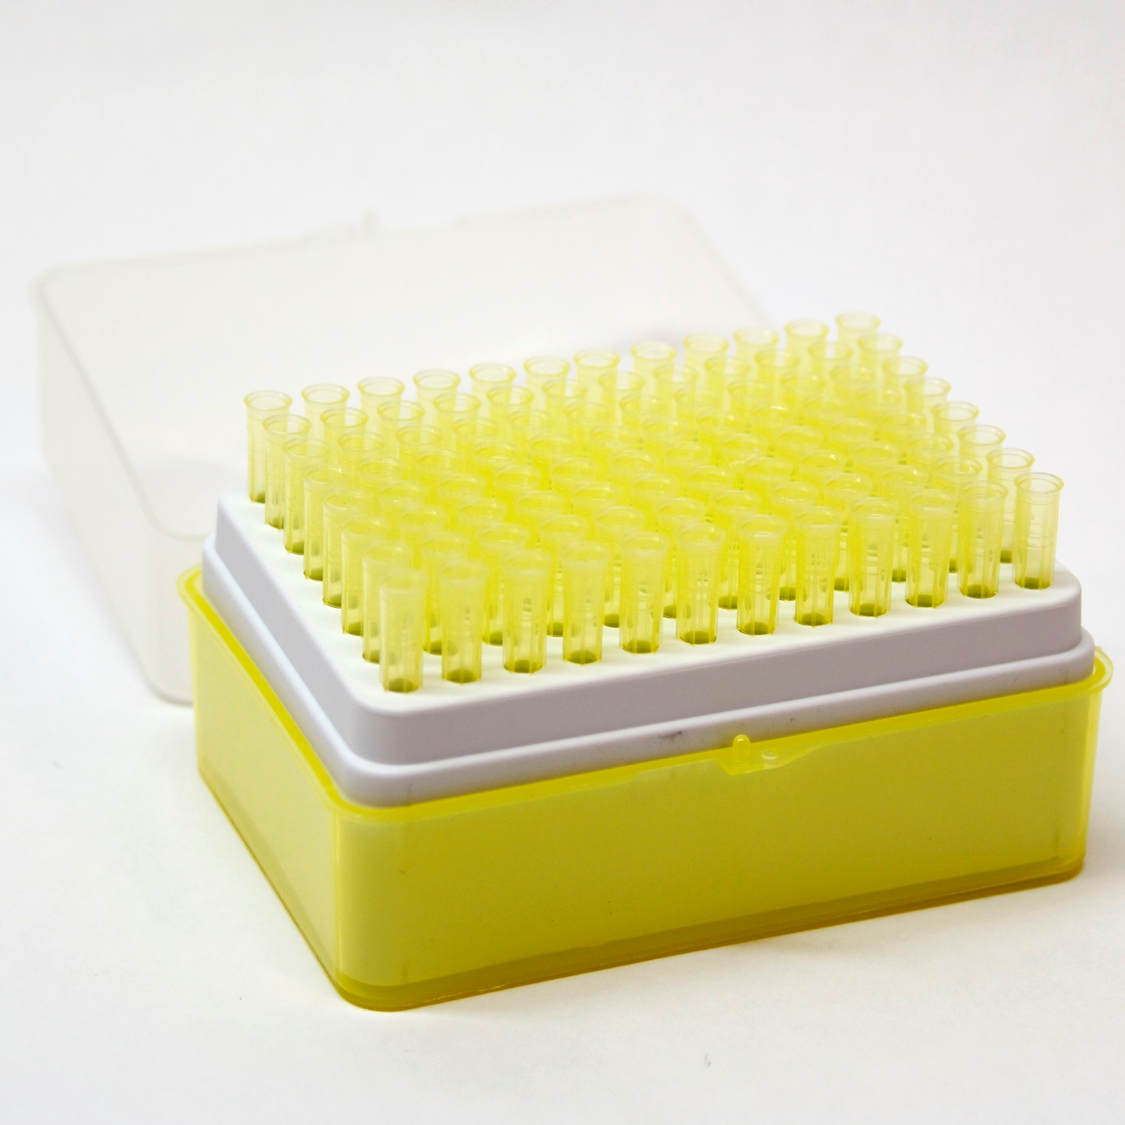
- first thing is putting the tip on. In order to do the place the mouth of the micropipette in a tip and push it down (it will look like the above picture)
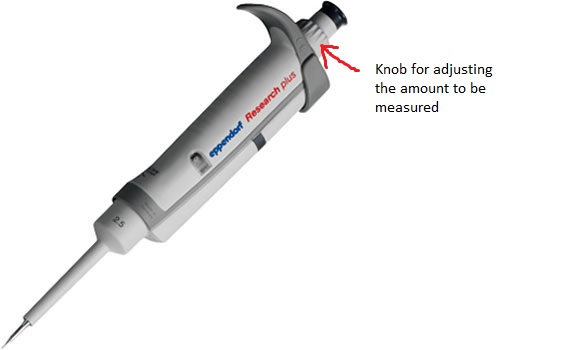
- There will be a knob (it is on the top in FIG 2). Turn the knob in order to adjust the amount to be measured.
- Press button 1. When you press the button 1 you will face a resistance this is called first stop. If you overcome this resistance and push the button all the way down you will reach second stop.
- Now press the button to first stop (this expels the air). Put the tip in the DNA sample and draw out the required amount by releasing the button.
- Now insert the micropipette in the well. Press button 1 to second stop and pour the DNA sample into the well. DO NOT RELEASE THE BUTTON.
- After pouring all the sample into the well, take the micropipette and place it over the dustbin. You can now release button 1. Press button 2 to eject out the tip.
- Take a fresh tip and repeat for other samples.
- NOTE: YOUR MICROPIPETTE SHOULD ALWAYS FACE DOWNWARDS.
SAFETY
It is all fun till someone gets hurt. We don’t want that right? yes, so there are some safety precautions that we must follow while carrying this experiment out
- WEAR GLOVES – TBE buffer can be an irritant on some skins. Ethidium bromide is toxic.
- WEAR LAB COAT- to protect from spillage
- GOGGLES – to protect from UV light
- Don’t come in contact with UV light
- Don’t use the power supply with wet hands.
ROLLING CREDITS
This technique is used usually to match DNA samples. They can be used in checking biological relationship between individuals and also used to match DNA samples in crime scenes.
I tried explaining the entire process as clearly as possible, but it is in no way a substitution for hands on experience (I would like to thank Science Center Singapore for giving me the opportunity for having a hands on experience).
I hope I could get your interests piqued and made you curious about this field. I love sharing my passion with all of you. I hope you all learned something and would want to carry out this experiment in the future
If you liked this post please like it and share it. If you have any question please post it in the comments or use the contact form. Thank you for reading this post and stay tuned for more content.

Excellent article. Got a chance to learn new things. Thanks for your post and please keep posting.
Requesting you to add a summary at the end.
LikeLike